Codes and Coventions of the Thriller Genre

Thriller is a type of genre that inflicts suspense and tense emotions. These films or television programmes tend to have plots that build up and leave people on the edge of their seats. Examples of thriller movies are Seven, Psycho, The Silence of the Lambs and World War Z. A recent series on Netflix called ‘Stranger Things’ has been a monumental success and has everyone talking.

In a thriller you would expect to see frequent use of low key lighting, shadows, contrasting camera angles and dramatic music. Typically there is a lot of close-ups of characters faces to conflict emotions. The storyline normally implies that something bad is going to happen to the protagonist character.

Editing a thriller typically involves lots of quick jump cuts as this helps to create pace and drama. Furthermore sound in thrillers is very tense to reinforce the mood and tone of the film. It often starts slow and builds up to be more effective and interesting for the audience. A good example of this is the soundtrack from the movie ‘Jaws’ as it is recognised worldwide.

Mise en scene includes props, location, facial expressions, body language, costume, hair and makeup. As I have already established the lighting is usually low key as it creates strong shadows and contrast between light and dark. Costumes are predictably dark or ordinary depending on the character. Makeup and hairstyles vary as well as the location.

After researching the genre thriller I found a website that described 5 ingredients used in a thriller movie to make it successful.

  1. Obviously you need to have a gripping story/plot.
  2. Open with an action scene.
  3. Include multiple point of view shots.
  4. Show don’t tell.
  5. Pace.

Before taking media I never gave thriller movies a chance and I assumed I would hate them before even watching them. However after researching the genre in more depth and learning about hybrid movies I have broadened my interest in the genre and I now wouldn’t hesitate to watch a thriller. I have become more open-minded.

Continuity Task Update

My group met up during the half term at Costa for an hour to discuss our project further and to finalise some details about location and props. After receiving feedback from my teacher about our idea we have taken on-board her comments and have simplified our idea to just a woman tied up in an abandoned location being interrogated by a man. Our piece will start with a faded in long shot of a mysterious figure walking across  a field. This will then be followed by various other shots evident on the shot list made by our DOP. Also our editor will insert some non-diegetic sounds of birds and the wind to make it seem more realistic. More details are found in the storyboard and moodboard I created shown below. My group and I have been communicating really well, we are sharing ideas and finding inspiration from other programmes. All we need to do now is set a date to start filming.

Work Experience – Pinewood

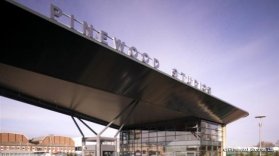
Two weekends ago on Saturday my friend Molly and I went to an open day at Pinewood Studios as we were interested in the makeup course in Iver Acagallery-pinewoodentranceday_smalldemy as an option for after A levels. I have always been interested in the film industry but never decided what job role I wanted to be until I was in the school production ‘We Will Rock You’. An A level student at the time was doing the main characters makeup using special effects makeup and it really inspired me. From that moment onwards I started buying products and watching tutorials and I found myself discovering what I wanted to be when I’m older.
The open day assured me that this is what I wanted to do and I decided this was definitely where I wanted to go after school. However as I’m only sixteen I can’t take part in the course yet as you have to be eighteen. However they asked me if I wanted to volunteer as a model for the students to practice on as it’s a great experience and it allows me to learn more about the industry. I officially started last Saturday and it was amazing! I learnt more about the industry and the various different job roles included. I was also told some personal experiences when working on sets and how to put yourself out there when finding work even if it doesn’t include payment. The theme at the beginning was 1940’s which then transitioned into a bomb explosion which really intrigued me. I will continue to model at Pinewood and document my experiences.

Initial Ideas

Main Idea:

For this task our criteria required us to demonstrate someone simply walking through a door and having a conversation with someone. This allowed us to be creative and do whatever we want with the criteria in mind.

For our continuity task my group was inspired by the BBC program ‘Wrong Man’s’ starring James Corden. We decided to have the main male character leave his office who walks into the wrong room and finds a beaten up woman tied up to a chair. He sets her free and ends up picking up a phone she has dropped. It then transitions into the next day where he is walking in the woods and the phone begins to ring so he frantically looks for it and answers it. On the other side of the phone is someone threatening him and leads into a big chase scene between him and a mysterious figure. This scene will include various camera angles and shot types to keep it interesting and tense. Eventually he gets home to his wife and has a conversation with her (fulfilling the criteria) and then goes to put the bins out. Whilst doing this across the road is the mysterious figure who disappears after a car drives past.

Rules:

When completing this task we need to keep in mind the previous rules we have studied including the 180 degree rule and rule of thirds. These rules will help to maintain continuity throughout. As well, we will need to consider various lighting and sound, whether we want to use natural lighting to make it seem more authentic or tense music to add pace to a scene.

Planning/research:

Already my group have had a meeting to discuss details and we have found the perfect location for our chase scene in Langley Park. The director has written up a script including stage directions for the actors to follow effectively. I have made a storyboard explaining the different scenes we will have, props we will be using and a collage of pictures of the locations. Additionally I have spoken to some actors that will be willing to play the roles in our piece. Our editor has shown us some examples of music he can create that we can use in our piece and finally the DOP is creating a shot list. We are planning to have more meetings during the half term to finalise some details and maybe even start filming!

Sound and Lighting

Sounds and lighting really contribute to a movie and can create some dramatic and tense moments, both set a certain mood and tone for a film. Furthermore sound and lighting can determine what genre a film is, for example the frequent use of dark low key lighting and eerie music could imply that the movie is a horror.


Sound:

Diagetic sound – Sound made on screen that we can see, for example dialogue.

Diagetic – Sound made out of shot that is added during the editing process, for example sound effects or music score.

Sounds Effects – Artificial sound, for example a gun shot.

Commentary – Voice over of someone speaking off screen played over the top of the movement on screen.

Parallel  Sound – Sound that exactly matches the event/action made on screen.

Direct Sound – Live sound.

Dialogue – Actors talking on screen.


Lighting:

Natural Lighting – Non-artificial lighting that doesn’t require electric light, this makes something seem more authentic.

Spot Light – A strong beam of light that only illuminates one person

Low Key Lighting – A lighting scheme that requires very little light, used to create strong shadows and contrasts between light and dark areas.

High Key Lighting – A lighting set up which is very bright and includes fewer shadows.

Key Light – The main light and usually the strongest with the most influence.

Back Light – This is placed behind the subject, it’s normally used to provide definition and to separate the actor from the background.

Filming Rules

Today we explored basic filming rules including the rule of thirds and the 180 degree rule. I found this lesson very interesting as it allowed me to understand how much planning and detail goes into a simple shot of two people talking. As well, one of my goals for this year is to gain more knowledge about cameras and how they are used to their best ability and I felt this lesson helped to improve my understanding. Furthermore this lesson will be useful when my group start filming for our continuity task.

Match on action – This is an editing technique where one shot cuts to another shot portraying the same action from the first shot. This creates a sense of continuity and makes a continuous scene maintain flow, which draws the viewers attention rather than separate shots.

180 degree rule – This acts as a filming guideline for actors in a scene. It helps to maintain the realistic nature of a conversation between actors by showing the left – right relationship and presents a greater sense of location.

Shot reverse shot – This is another editing technique that is used in conversations between characters looking at each other. The first shot shows what the other character would see whether that is a point of view shot or an over the shoulder shot, followed by a reverse angle shot of that same character looking at the other person. This ties in with the 180 degree rule as they are both used to maintain consistency.

Shot types:

  • Extreme long shot – Furthest distance from subject and emphasises background. Biggest distance out of all the different shot types.
  • Long shot – Shows a characters full body length and some surroundings.
  • Medium shot – Usually presenting a character from the waist upwards.
  • Close up – A detailed view of a persons face/ body part or an object filling up the entire frame.
  • Extreme close up – A shot focusing on only one part of a person in a very large scale, for example the eye.

Camera angles:

  • High angle – A shot placed a bit above eye level.
  • Low angle – A shot placed below eye level.
  • Birds-eye view – Looking directly down above something.
  • Worms-eye view – Looking directly up at something.
  • Wide angle shot – A broad shot taken with a wide angle lens.
  • Tilted shot – When a camera is tilted on its axis so the vertical lines appear slanted to one direction.
  • Two shot – A shot of two people together.
  • Point of view shot – A shot made from a camera position close to the line of sight of the actor.

Mise en scene – In its simplest term means the arrangement of props and actors on a set/stage. It is split into setting/location, costume, lighting, props, colour, position, body language and facial expressions.

Rule of thirds – This acts as a basic guideline for taking effortless photographs. It can compose an image to create a sense of balance without looking too structured. The tool presents a grid of nine boxes that you can use to align objects within the frame depending on what you are trying to achieve. A top tip when using this tool is to have the main subject positioned either in the left or right region, not in the direct centre. When capturing a landscape you usually align the horizon with the upper or lower third of the frame as it appears more dramatic. Additionally you can have off centre shots which portray movement or motion, for example a bird taking off. I tested out the rule of thirds for myself and here were my results: